
How to create the perfect mood board for your small business
What is a mood board and why is it important?
According to Google, a mood board is "an arrangement of images, materials, pieces of text, etc. intended to evoke or project a particular style or concept." Exactly, thanks Google!
A mood board is the perfect starting point when beginning to think of what your small business' whole look and vibe should be 💅
It's the very first thing most designers create to set the tone (or mood, if you will) for the brand or website project they're working on, and it's actually a super easy process to replicate for your own small business branding DIY!
Mood boards come in handy for several reasons:
Providing inspiration
Not only are mood boards super fun to create (hola at all the pinterest girlies 🙋♀️), they serve as an amazing source of inspiration to help you come up with plenty of other related design ideas. By creating a cohesive mood board, you'll also be able to easily identify on-brand colors, motifs, and fonts for a super cohesive brand, social media presence, and website design.
Helping you stay on track
Having a concrete, cohesive mood board will also help keep you focused, facilitating any design decisions you might have to make and ensuring your designs are all heading in the right direction. By referring back to your mood board, you'll be able to keep your brand and website consistent and coherent, a crucial element in every successful brand that builds trust and recognition with your audience.
Collaborating with your team
Once your small business grows, you'll likely be hiring and outsourcing a thing or two. Having a set mood board that you can share with your new team is a great way to visually communicate your brand's identity, values, and aesthetics all in one! It will help everyone involved understand and align with your vision, and make sure you're all working towards the same goal.
Convinced? Let's mood board!👇

So, how do you start?
There are a ton of platforms that you could use to create your mood board, think Pinterest, Canva, free stock photo sites like Unsplash, any of the Adobe programs like Illustrator or XD, and a ton of new visual comm platforms that are popping up every other week!
We've got some faves of course, and for small business owners who are into a little DIY, we're going to show you how to easily create your mood board using one of our favourite free graphic design tools: Canva! Of course, the process is largely the same whatever platform you choose, so pick your poison and let's get started!

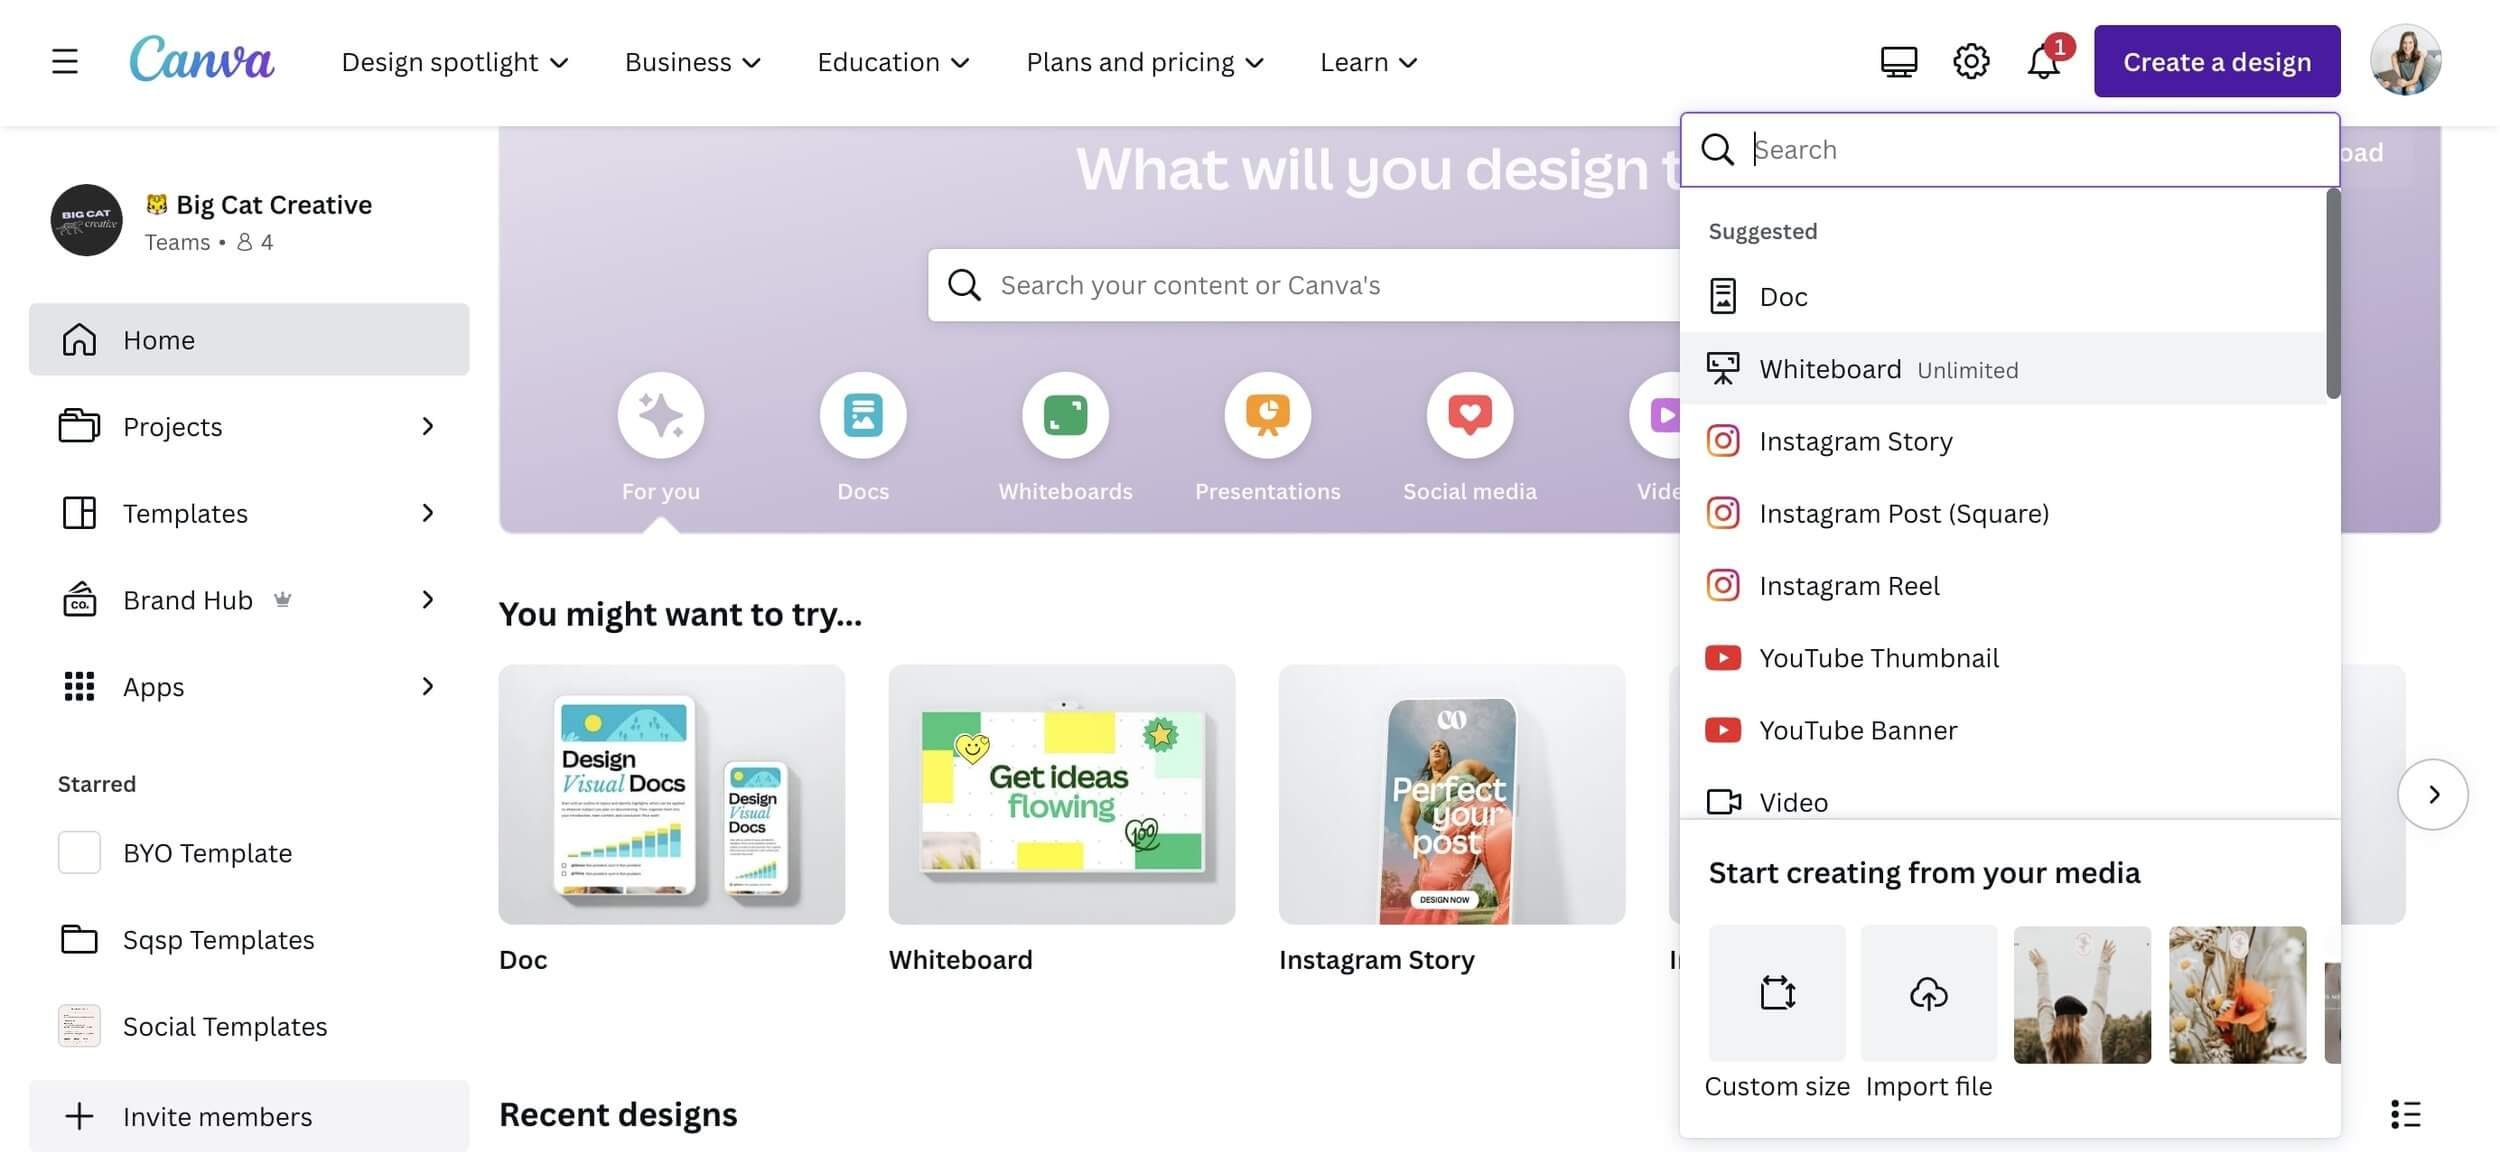
How to create a mood board in Canva
1. Create a new design in Canva
In Canva, create a new design. Any size will do but the bigger the better so that you have loads of space to collate all your images without feeling constrained.
We love using a whiteboard document for this as it has unlimited space which is ideal to let your creativity flow!
2. Search for images
Now comes the fun part! ✨
In your new Canva design, click on Elements in the left hand sidebar, scroll to Photos, and click See All to access Canva's super extensive stock photo library.

Scroll through the Trending section for inspiration or use the search bar to search for words or ideas related to what you envision for your brand.

Click on any image that you are attracted to or that feels aesthetically right for your brand to add it to your board. Even if it's not perfect, or if you only like a small portion of it, add all the images that you find interesting at first and you can always do a cull later on! The more visuals, the more ideas you'll have!

If you're struggling to find images that are perfect, you can try different free stock image sites like Unsplash or Pexels.
Try to collect at least 10 - 20 cohesive images of all kinds of shapes, subjects, and textures, to get a well rounded mood board that really reflects your vision for your brand. Remember to stay focused, the hardest part is to stop 😂
3. Arrange your images into a board
Start positioning your images in a collage to see how different images work together and what type of vibe they give of (don't worry, it's as simple as drag and drop in Canva!).

Once you're pleased with your mood board move on to the next step and reevaluate ✨
How to pick the best images for your mood board
Think of your dream client
Of course, you want your branding to reflect you, your business, and personality to a tee. But you also want to make sure that your branding attracts who your business is meant to be for: your dream client.
If you haven't already, do a little soul-searching to identify who your dream client is. Are they male? Female? What is their job? What do they like to do? What are their goals? Passions? Struggles? How are you going to help them?
When your dream client stumbles across your brand or lands on your site, you want them to feel seen. If they like what they see, and the mood it sets, they'll be more likely to engage and go ahead with your offer.
For example, if your dream client is a burnt out solopreneur looking for a relaxing break, your mood board visuals should probably feature a sense of calm (think pastel colors, plants, yoga, massages), and nothing along the lines of hardcore, moody, or intense visuals that they won't want to stick around for!
Have a little brainstorming sesh and use this to come up with or refine your search terms.
Use related images in Canva
If you find an image that you really like, click on the three dots in the top right corner of it to reveal additional information about it.

There's two particularly handy areas here:
Click 'view more by [photographer name]' to show more images by the same photographer. This is helpful to find more images that may be from the same shoot, or that have a similar style.
Click 'show all keywords' to reveal the list of keywords (aka search terms) associated to the image. Take note of the ones that might be relevant to your business and use them to search for more images!
Another fun Canva feature that can help you find related images is Magic Recommendations ✨
Once you've picked a few images for your mood board, Canva's algorithm will come up with some ideas of what other images you might like.

What comes next?
It's time to re-evaluate and make sure the mood board you came up with is well aligned with what you had envisioned.
Consider it from your dream client perspective, and if you don't absolutely love it, give it another go! The great thing about using a Canva whiteboard is that you can just scroll off to the side, and boom, a totally blank canvas to start again, but zoom out a little and you can compare everything you've put together super easily!
Once you're satisfied with what you've created, you can download the file as an image from Canva if you want to share it.
The next big step is to come up with a color palette for your brand and we've got the perfect DIY tutorial for you that will make perfect use of your brand new mood board. Happy designing!
👉 How to create the perfect color palette for your website (easy DIY!)
How to create a mood board in Illustrator
If you're a new designer learning how to use Adobe Illustrator, this tutorial might be more suited to you! Plus, grab our free moodboard templates.
Follow our tips and tricks outlined above to search for inspirational images that reflect your small business vibes to a tee.
Save the images that you think will work best and open up one of our mood board templates in Illustrator:

👉 Get our mood board templates
Next, arrange your images into the templates!
File > Place your images into the document
Or, select them all in finder drag them on to the artboard.
Place your image over the section you think you want it to sit, right click on it and “Arrange > Send to Back”

Once it is sent to the back, hold down shift and select the section you want the image to be in. Now the section and the image should both be selected.
Right click on them and select Make Clipping Mask.

Now your image should be within the section, like this:

Easy right? You can do this over and over again with each image until all the spaces are filled up. You’ll get really fast at this too after you do it a couple of times 😅
You might need to resize images so that they fit within the section you want them in. Make sure to hold down SHIFT when you resize images so that they keep their proportion and don’t get distorted (stretching images is a no go!).
We recommend adding some sort of text or font style in the small circle section and you can do this exactly the same way you position your images.
Create your text, for example a large black square and some white text over it, then group those two together and followed the usual steps of making a clipping mask.

Now you might be wondering, how do I change an image once I have already added it?
Double click on the image you want to remove. Then you will see a selection of the image (inside the clipping mask) like this:

Click once more, and you will have selected the original image like this:

From here you can resize or remove the image. To remove it, just press the delete key. Once you have deleted the image, double click back out on the artboard to go back to normal viewing mode.
Now you will see that the box is still there but there is nothing inside of it. Ready for you to add another image!

TIP: Instead of only using images, try also using blocks of color. For example, you'll see we've used You can see we've used a green and a black in the bottom left and right blocks.
TIP: If you want to put a border around all of the images, select all of the sections in the board and increase the stroke to your desired weight. You can also change the color of it to whatever works for you!
Want more DIY tips and tricks? Check out the posts below 👇
How to Change the Colour of your Images and Graphics in Canva for FREE (works with JPGs and PNGs!)
How to create an image outline in Canva (easy!)
How to create circle text in Canva
5 easy writing tricks for better DIY Copy
How to grow your business and get clients with Instagram in 2022
